Create a webhook for your channel
In your Discord app, in the top left corner, click on your server name.

Click on "Server Settings"

Click on "Integrations" in the left nav, you will see "Webhooks".
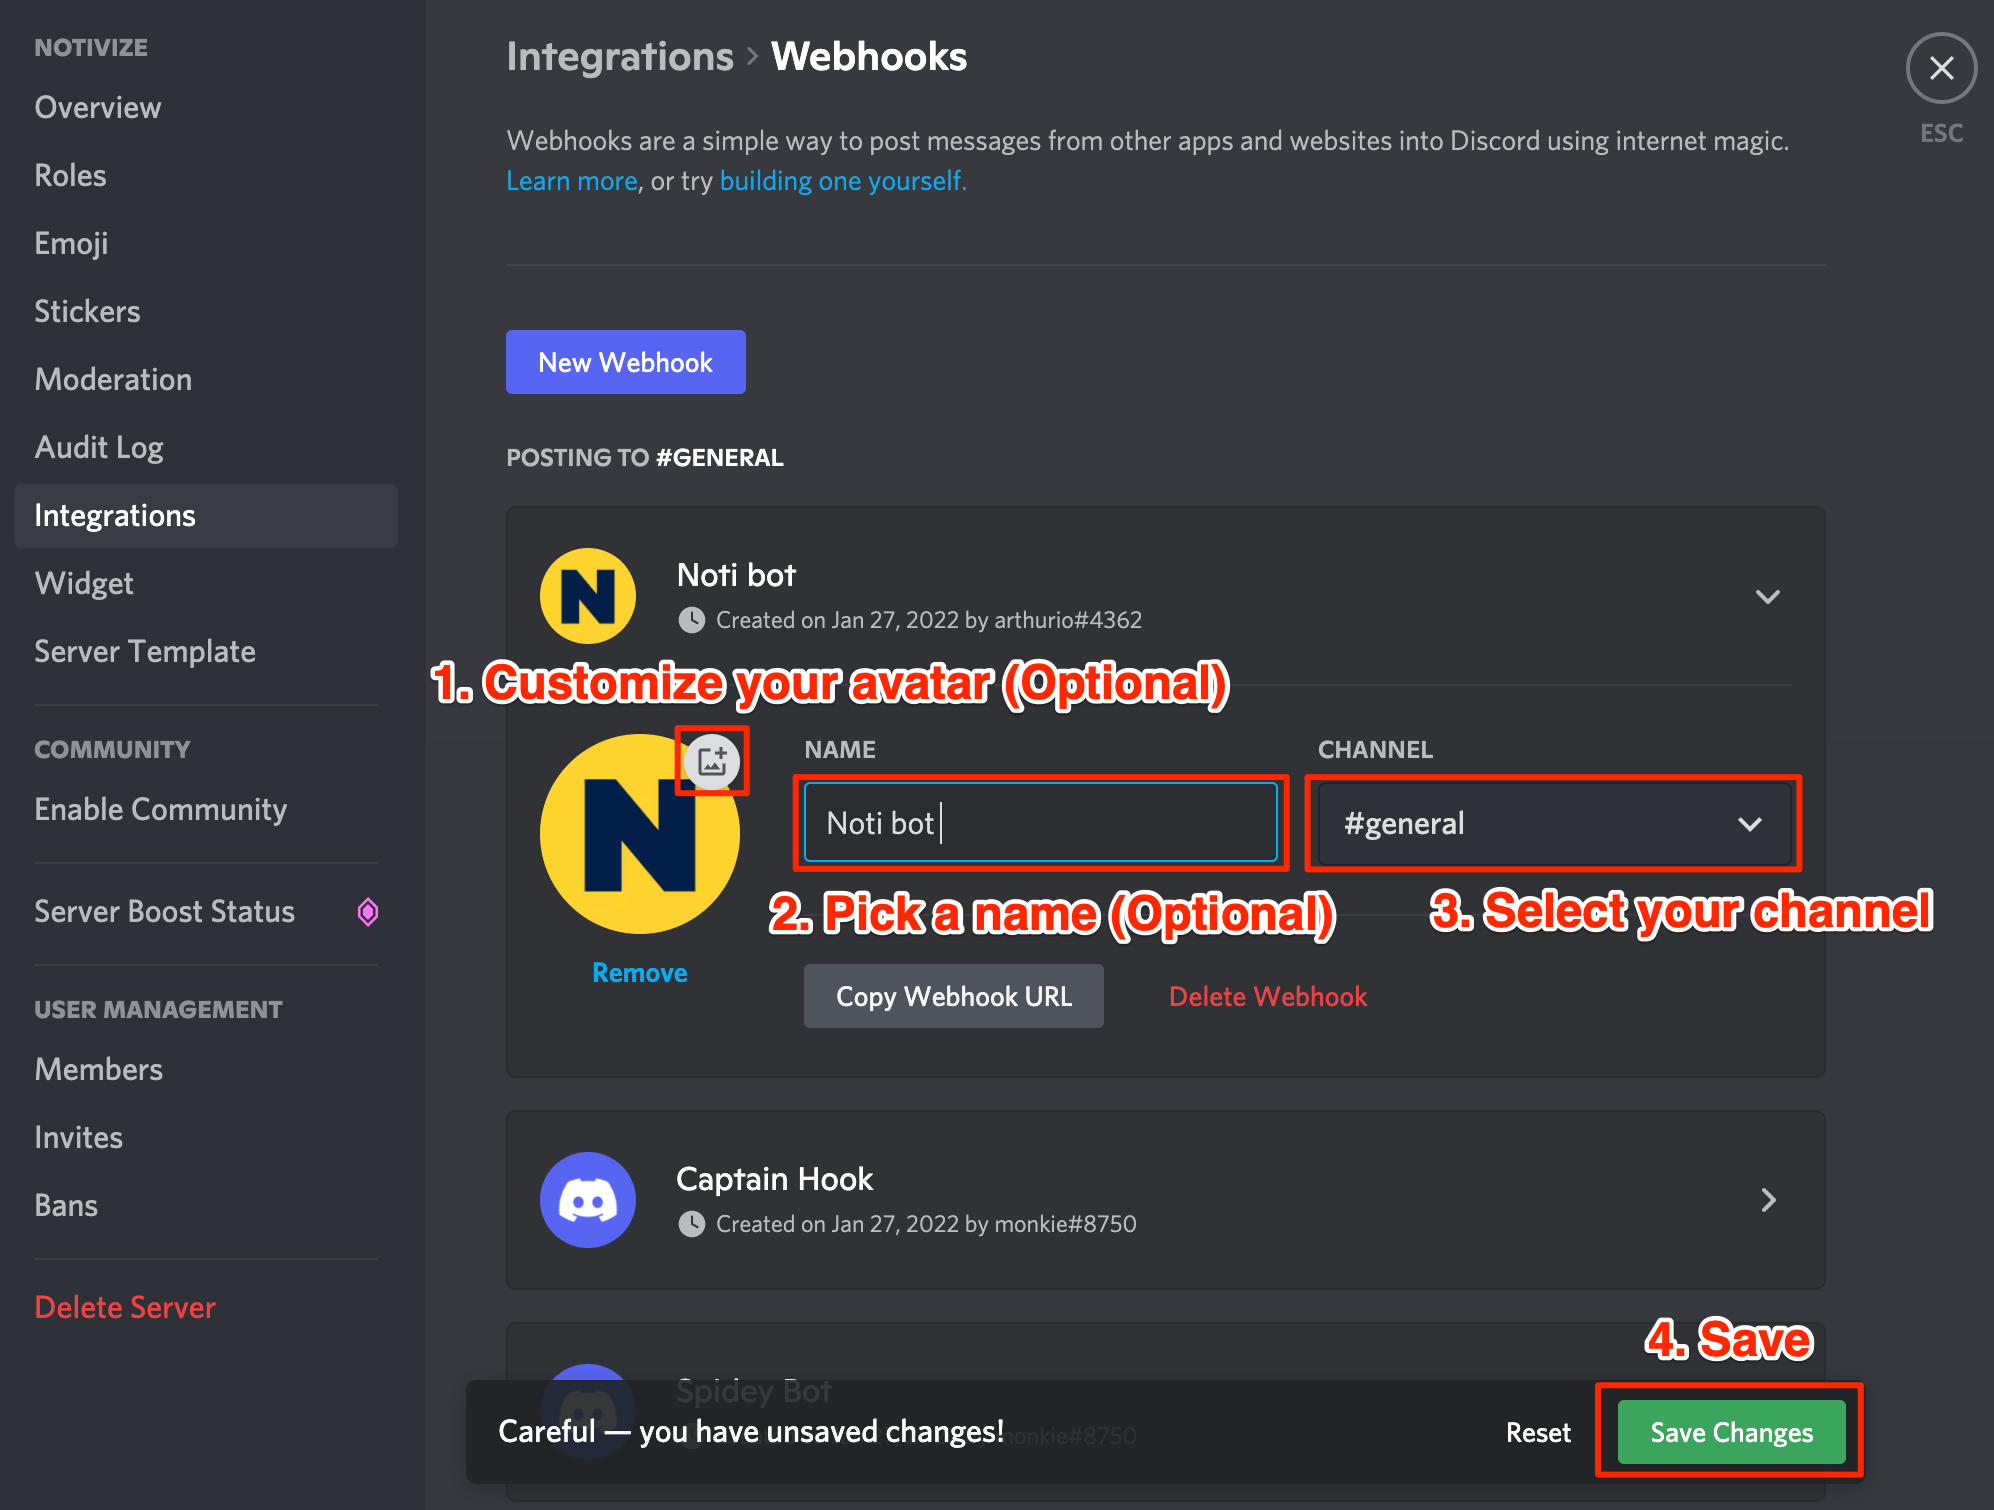
Let's click on "Create Webhook" to create a new Webhook.

You can name your webhook bot, change the default avatar and select the channel you want to send notifications to.
📘 Naming your webhook bots
Since you need one webhook per channel, you might end up setting up multiple webhooks that will be used by Notivize. For consistency, we recommend giving them all the same bot name and avatar.
Click "Save Changes" when everything looks good.

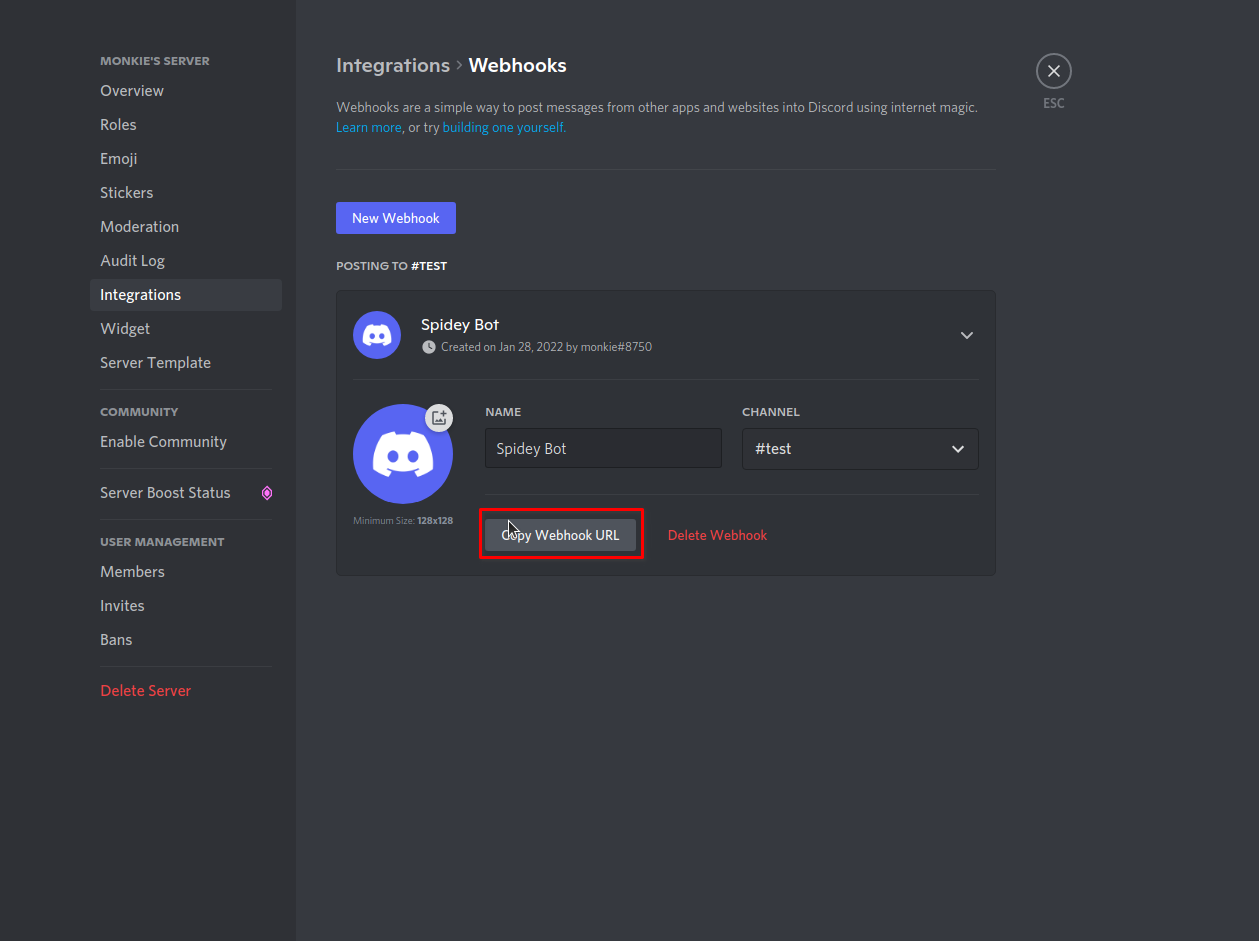
Now that your webhook is created, click on "Copy Webhook URL" and keep that handy for the next steps.

Setup your Discord integration on Notivize
Log into your Notivize account and go to "Settings". Scroll down to the "Messaging Apps" section and click on the "Discord" card.

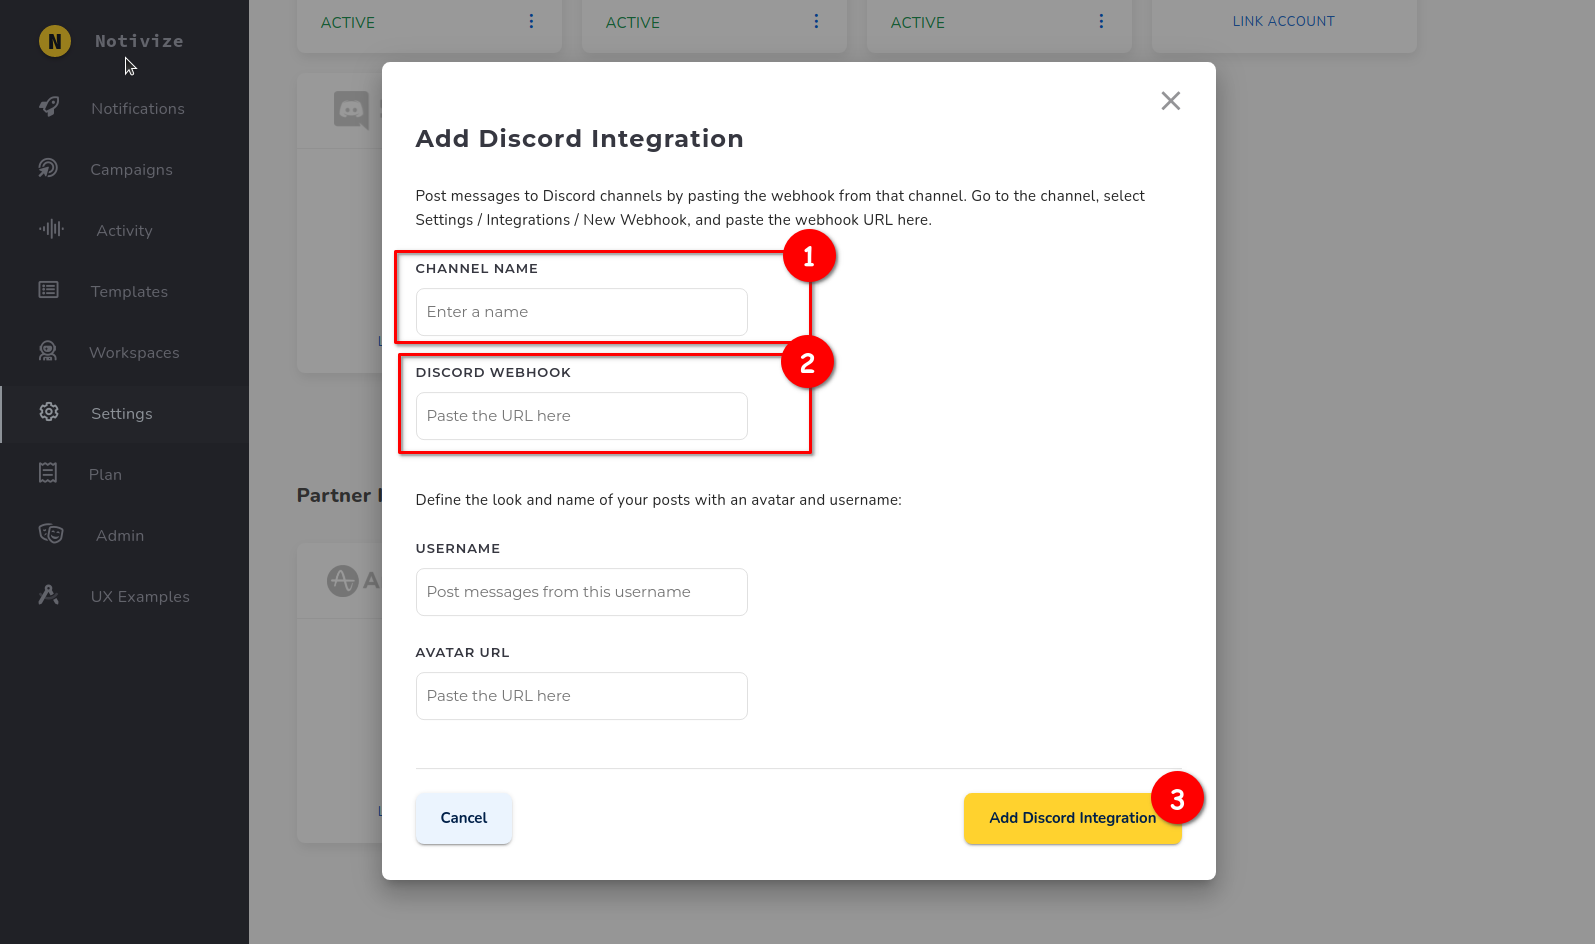
- Under "Channel name", enter something meaningful that will allow you to differentiate 2 discord integrations if you setup multiple servers/channels. Our recommendation is to use
[Server name] - [Channel]. - Paste your webhook under "Discord Webhook".
- Click "Add Discord Integration"

If you want to override the bot name and avatar you entered in the Discord settings, you can add an image URL and enter a name here. These are optional fields; if you leave them empty, Notivize will use the avatar and name you entered on Discord.
You can now use Discord to send your notifications :tada: