Notivize offers two ways to secure your event endpoints against unwanted event injection: API key authentication and JWT authentication. Read more about them and choose which is most appropriate for your use case.
API Key Authentication
API keys are a form of "shared secret" authentication, wherein a long string of random characters is generated by Notivize, and your code uses this same string when communicating with Notivize to prove your identity, since only Notivize and you should know the key. API keys are commonly used for server-to-server integrations where the code runs inside a controlled environment and the API key can be kept secret.
API keys should not embedded in front-end HTML/JavaScript, or in a mobile application such as and Android or iOS app. Any code which runs on the end user's computer (as opposed to your server) is inherently insecure against snooping.
API keys are standard practice for most server-side deployments, including APIs and services in C, C++, Go, Java (non-Android), Node.js, Python, Ruby, and more.
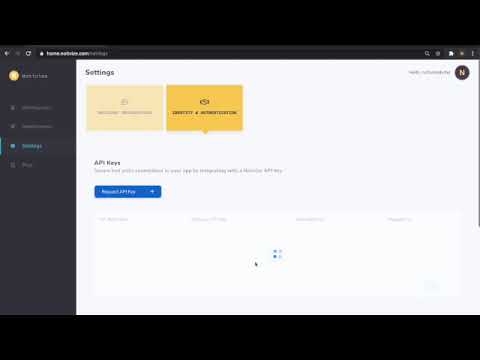
To add an API key:
- Click "Settings" in the left menu
- Click "Identity & Authentication"
- Scroll to "API Keys"
- Click "Request API Key"
- Name your key
- Copy the key for use in your code
- Click "Done"
To configure API key authentication:
- Click "Workspaces" in the left menu
- Select the workspace
- Select the notification
- Scroll to "Secure your endpoint"
- Select your existing API key
- Your code samples will update to show how to send the API key with your events.
JWT Authentication
JWT authentication is a form of cryptographic authentication, wherein a trusted source who knows the identity of the user issues a "token" to the user which is cryptographically signed. This token is easy for anyone (e.g. Notivize) to verify, but can only be created by the trusted source (often a social network or an IaaS platform such as Auth0). JWTs are usually used for delegated sign-on on major web platforms such as "Sign in with Google".
JWTs are appropriate for many client-side web frameworks such as AngularJS, React, or Vue, or any mobile or even server-side application which uses authentication that already produces a JWT for the user.
To add a JWT provider:
- Click "Settings" in the left menu
- Click "Identity & Authentication"
- Scroll to "JWT Providers"
- Click "Add JWT Provider"
- Enter the URL to your public JWK set. These are the public keys which anybody can use to verify the authenticity of a JWT issued by this provider. This parameter is required, and will ensure that only JWTs issued by this provider are honored.
- Optionally, enter an audience parameter to verify. This is not required, but is recommended if you are directly using a major social login provider such as Google OpenID. This will ensure that only JWTs which are issued by this provider for this audience are honored.
- Click "Check API Credentials"
To configure JWT authentication:
- Click "Workspaces" in the left menu
- Select the workspace
- Select the notification
- Scroll to "Secure your endpoint"
- Select your existing JWT provider
- Your code samples will update to show how to send the JWT with your events.
