Overview
This article will show you how to use AWS Simple Notification Service (SNS) with Notivize.
In order to track notification deliveries properly there are a few manual steps that you'll need to take, but they are pretty easy and we'll walk through them step by step.
You'll need an IAM user with the correct permissions to get started.
AWS IAM User
In order for us to be able to create the required resources for sending SMS notifications via SNS and tracking delivery metrics, we will need an AWS access key id and secret key with the following permissions:
- AmazonSNSFullAccess
🔒 List of permissions
The reason we ask for full access on SNS is to make sure we can create the required resources to send SMSes, verify your configuration and track delivery data. It also means we won't have to ask you to change your permissions in the future if we add more features to our integration with SNS.
However, we understand that security is important and you may want to limit the permissions to the strict minimum. Here is the exact list:
Comment: Deny publishing to topics
Effect: Deny
Action:- "sns: Publish"
Resource:
- "arn:aws:sns:::*"
Comment: Allow publishing to sms and other requiredbr/. Effect: Allow
Action:- sns:CreateTopic
- sns:Publish \t\t
- sns:Subscribe
Resource:
- "*"
SNS delivery metrics tracking
Setup SNS delivery status logs
- Login into your AWS account
- Go to the SNS console: https://console.aws.amazon.com/sns/v3/home#/dashboard
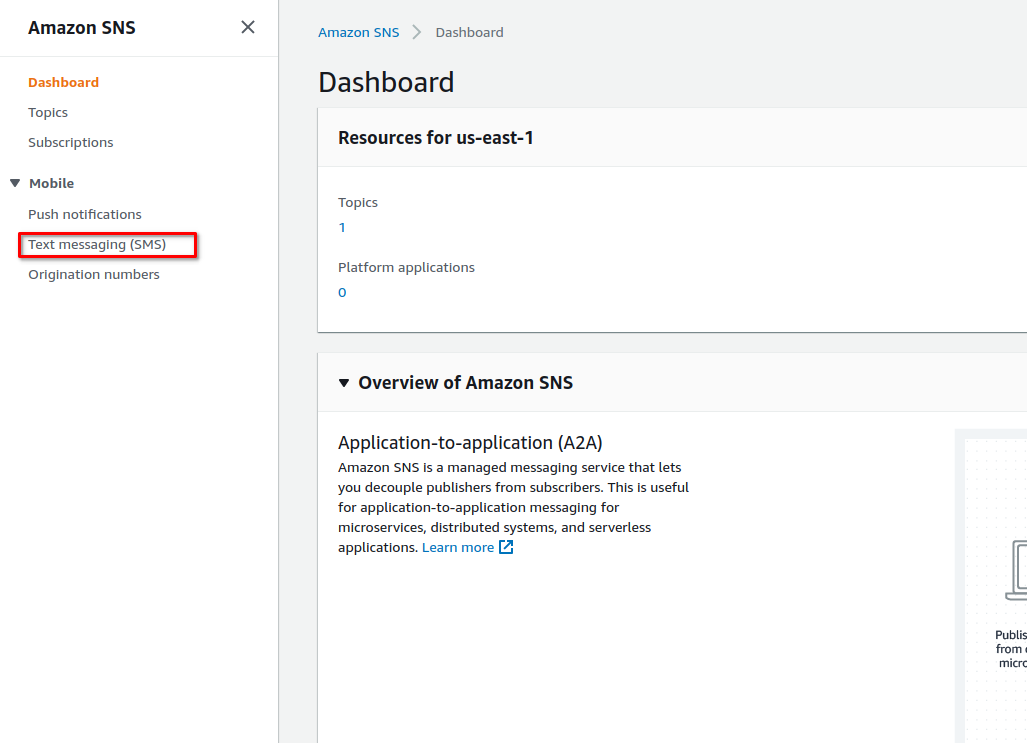
- Click on "Text Messaging (SMS)"
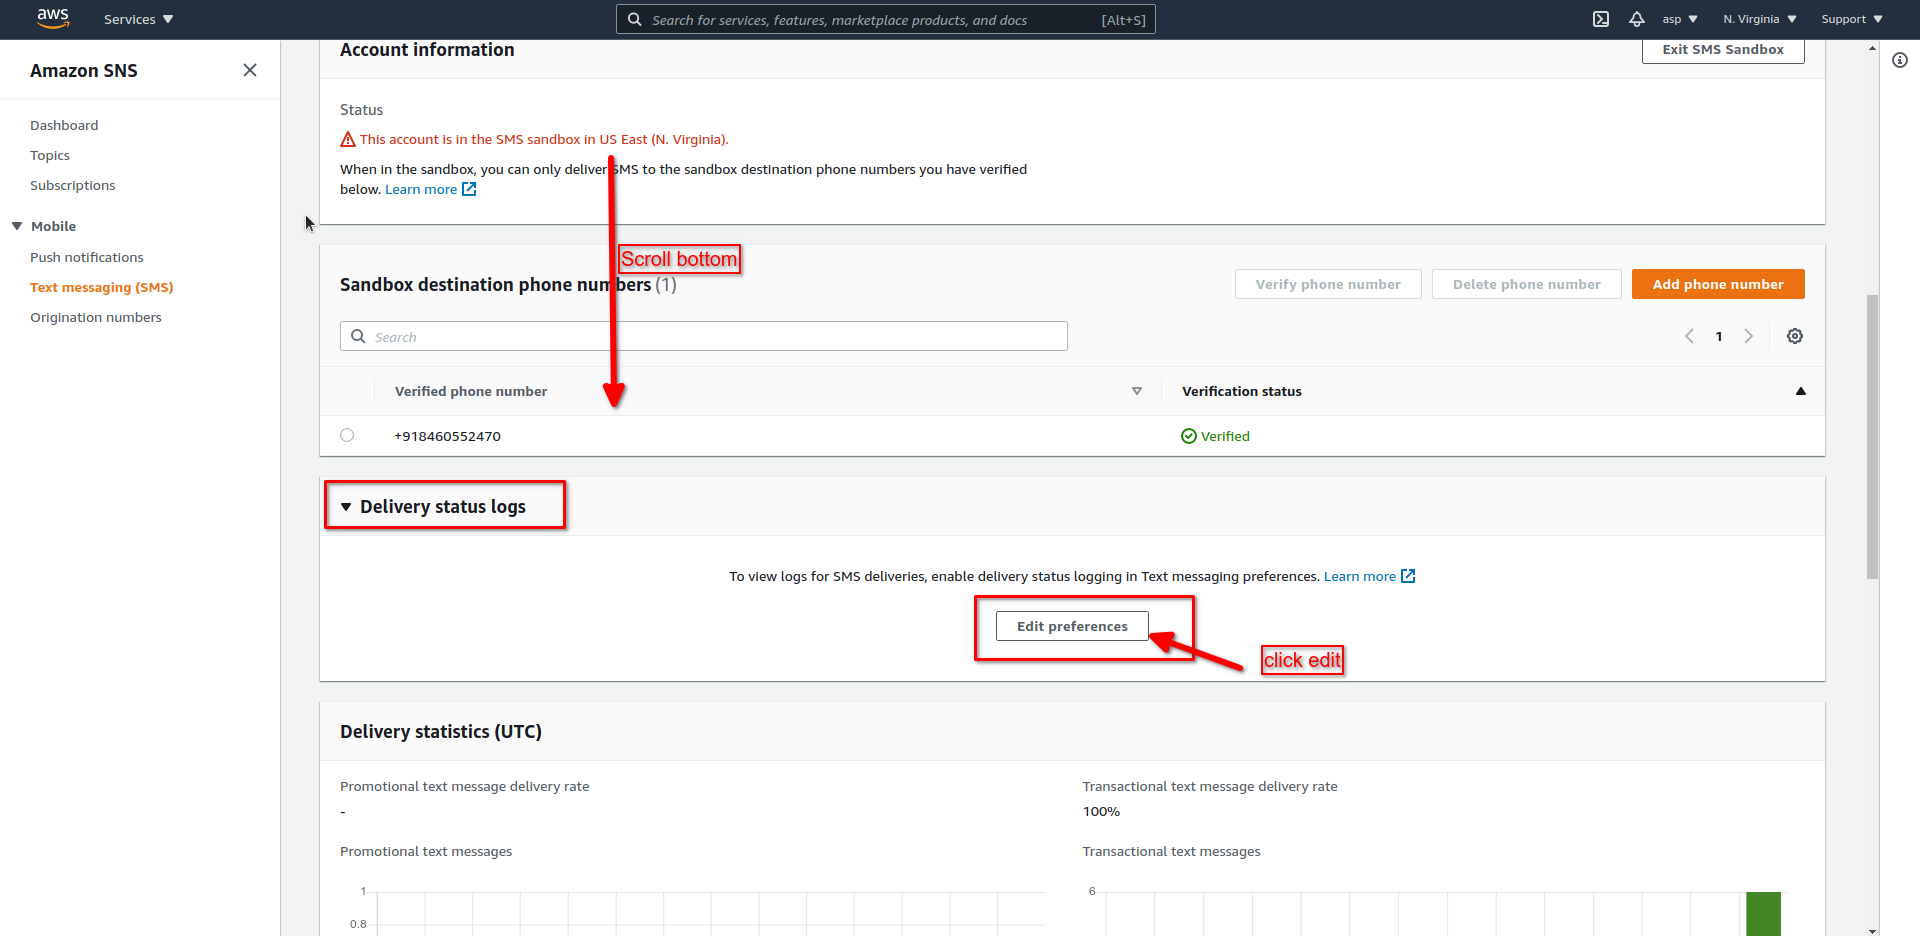
- Scroll down and click on "Edit Preferences"
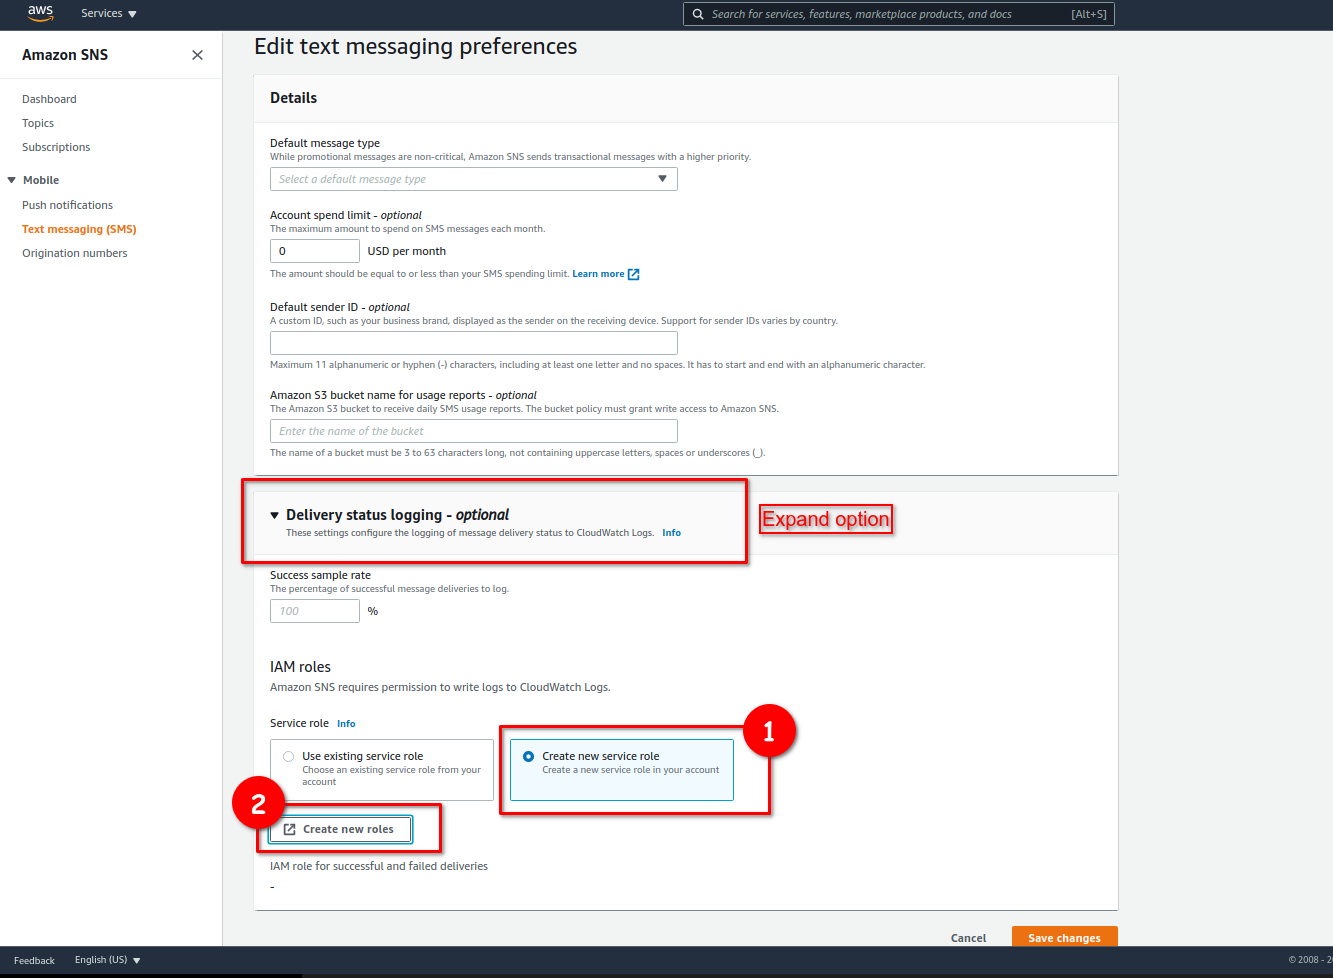
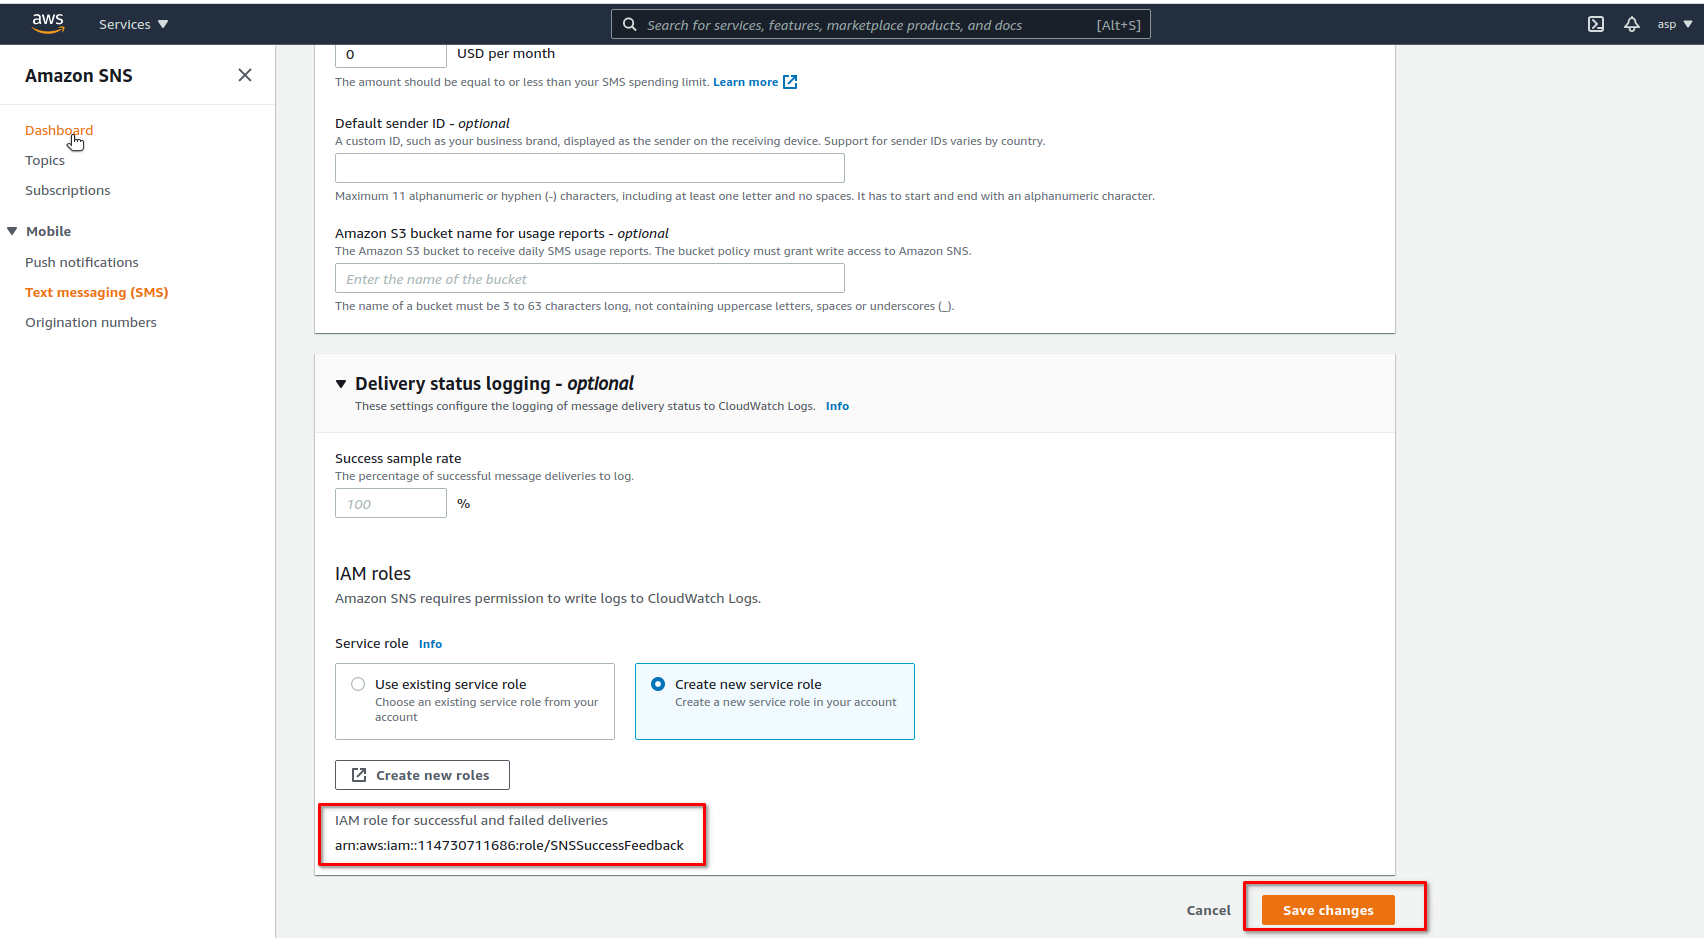
- Expand the "Delivery Status logging" panel, select "Create new service role", and then click on "Create new roles"
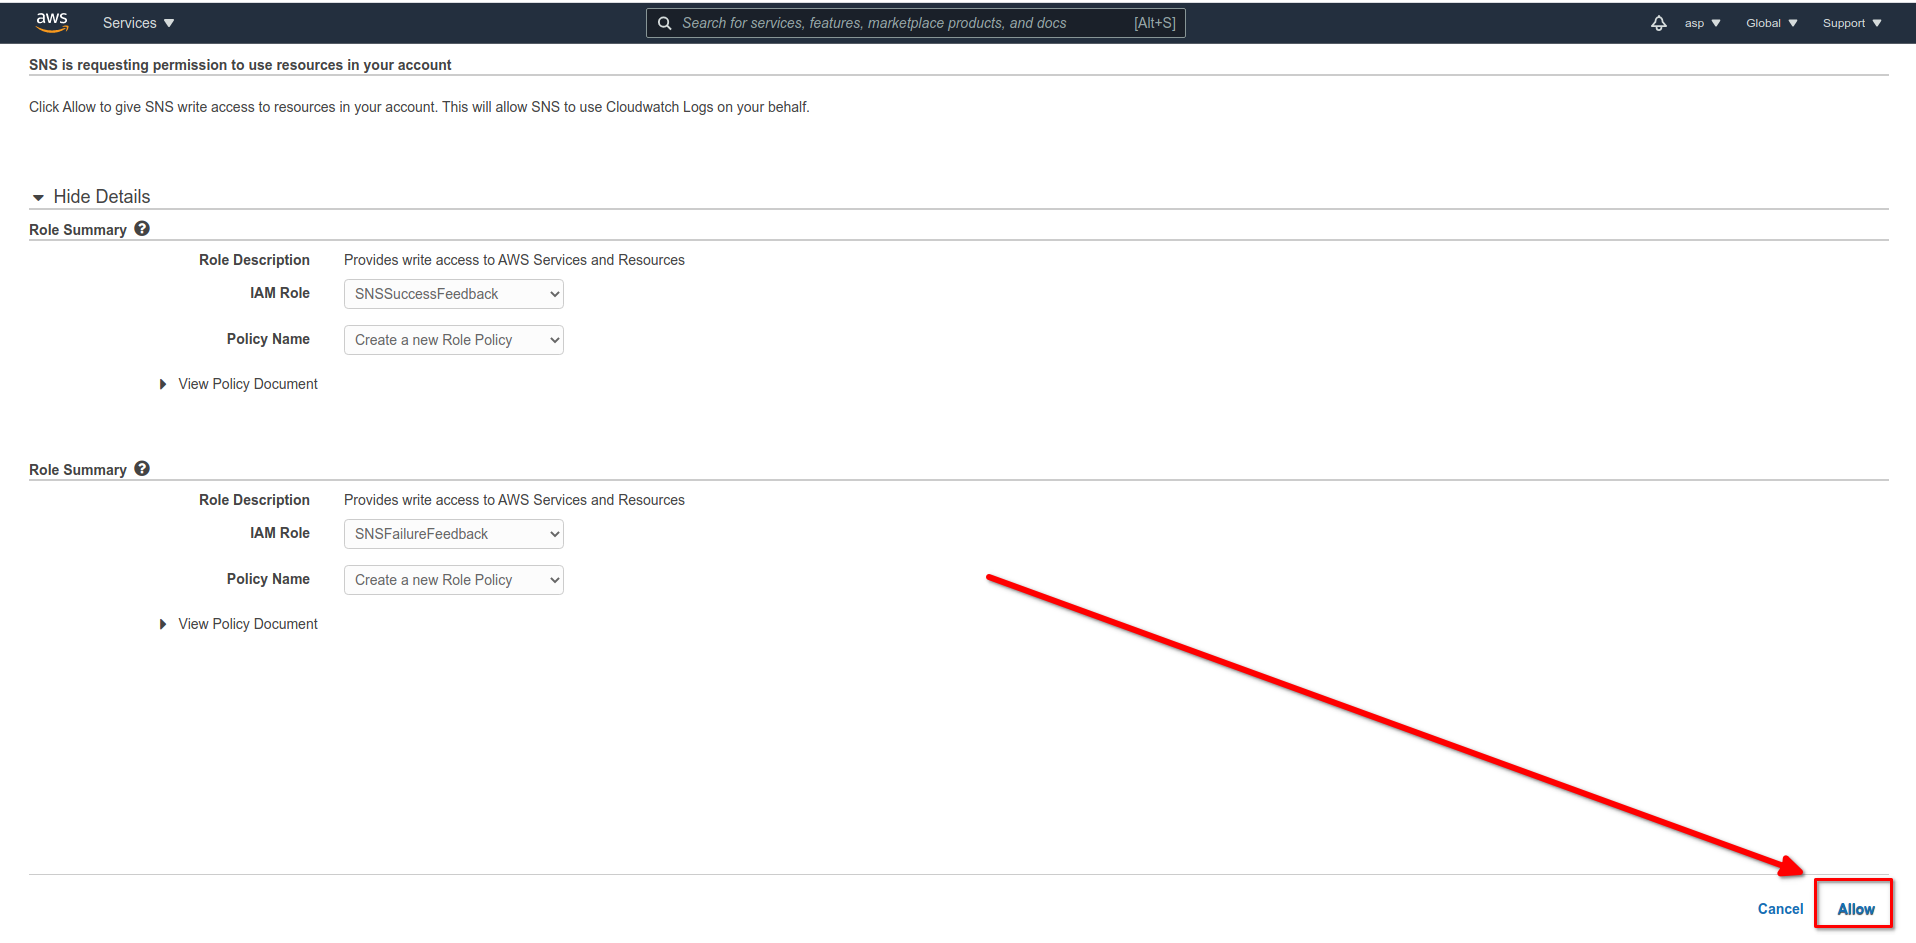
- In the new tab, keep the default values and click on "Allow"
- Close the tab
- The new role ARN will be populated and you can click on "Save changes"
Create Cloudwatch Log Group
📘 Pre-requesite
You must have purchased an origination number that has SMS capabilities.
See details at https://docs.aws.amazon.com/sns/latest/dg/channels-sms-originating-identities-origination-numbers.html
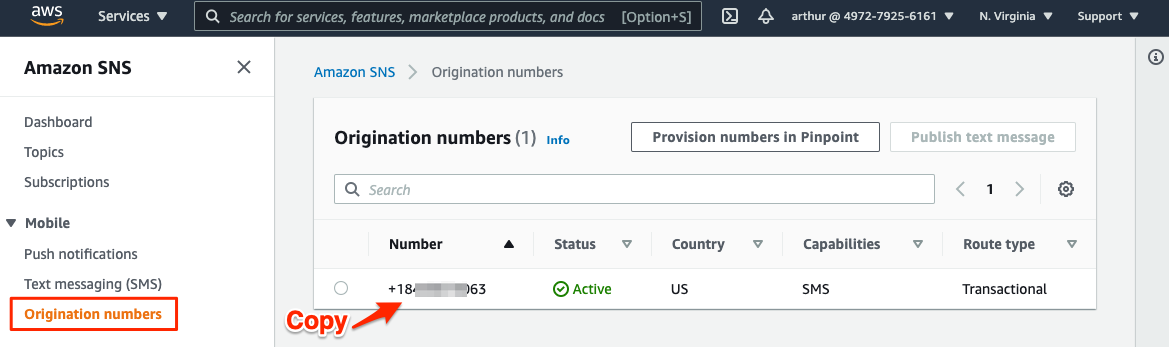
- Go to the SNS console
- Click on "Origination numbers" and copy the number you will be using to send a test text message
- Click on "Text messaging (SMS)" in the sidebar and click "Publish new message"
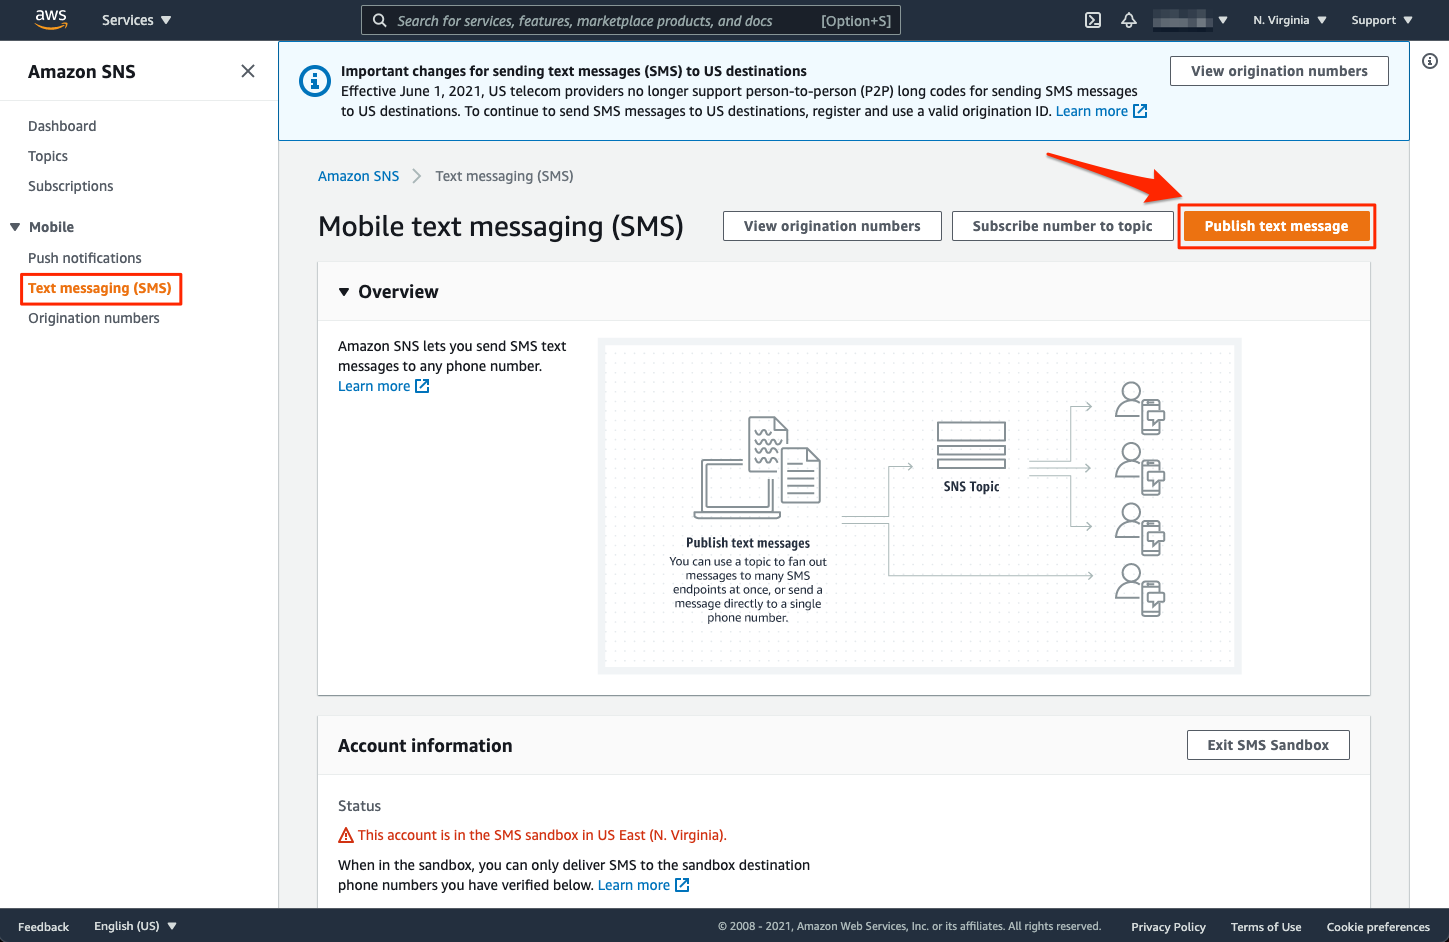
- Fill in the required fields and click "Publish message"

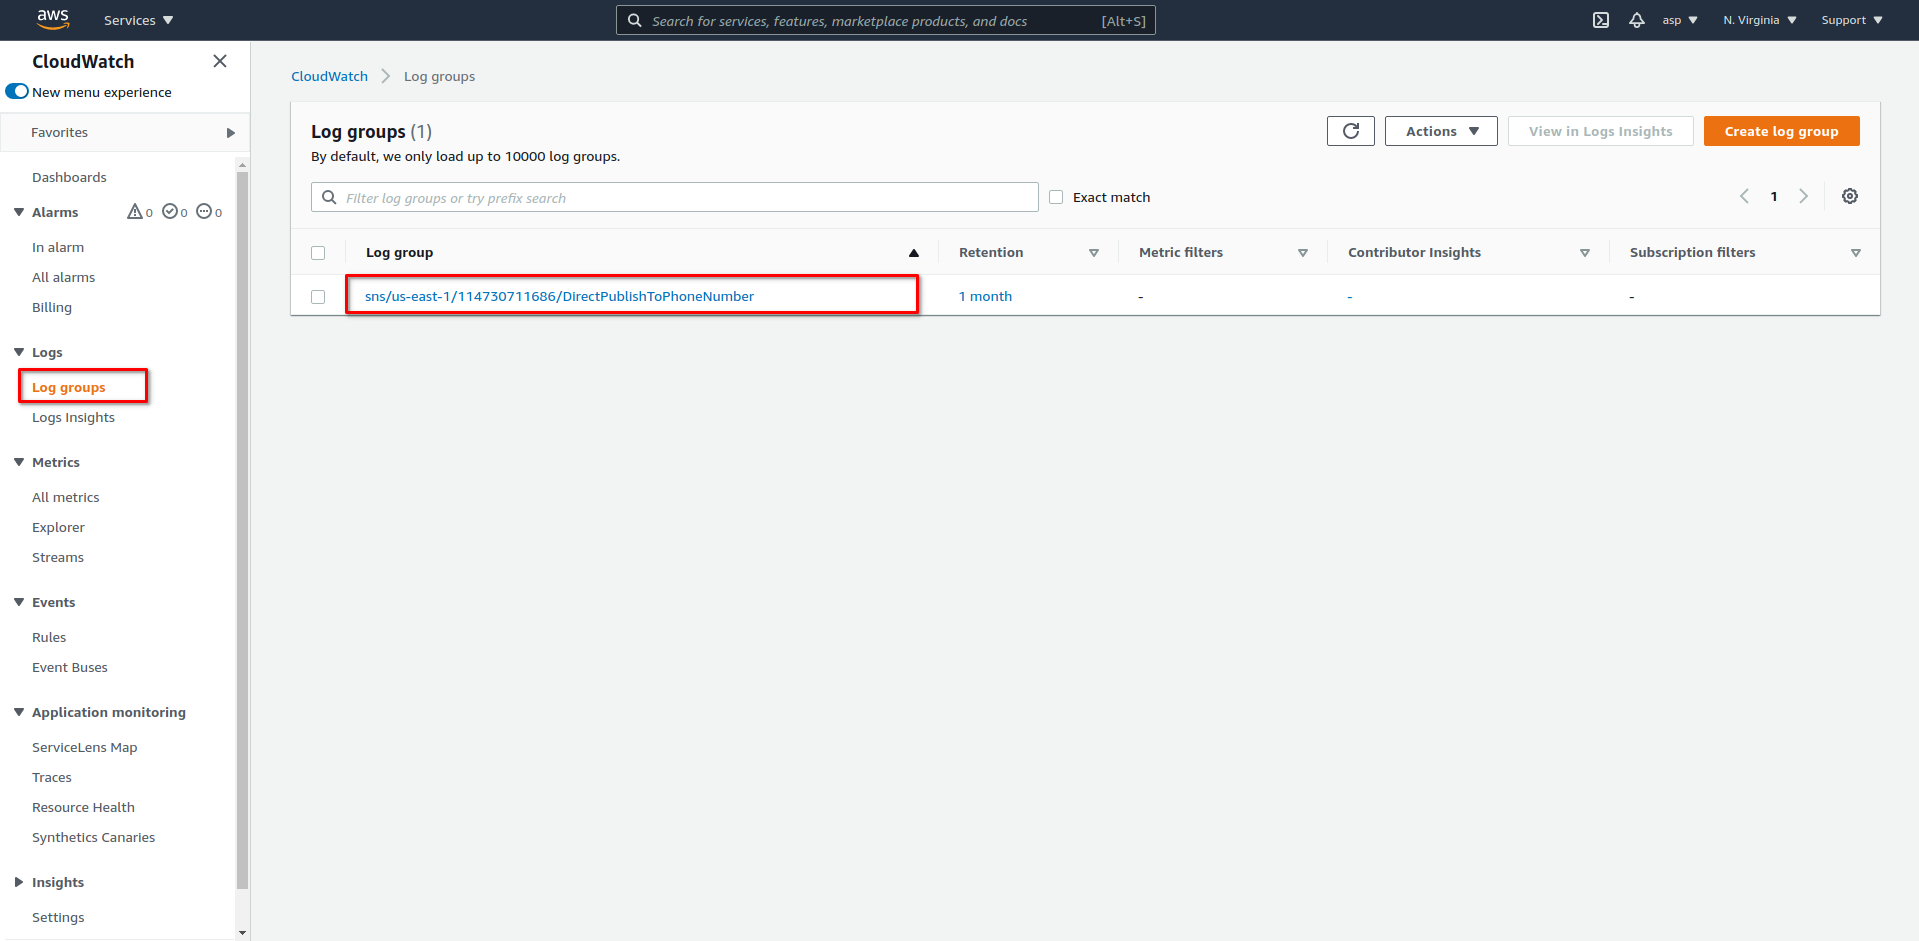
- Go to the Cloudwatch console and click on "Log groups" in the side nav to check that the log group has been created (the name should be similar to the one in the screenshot)
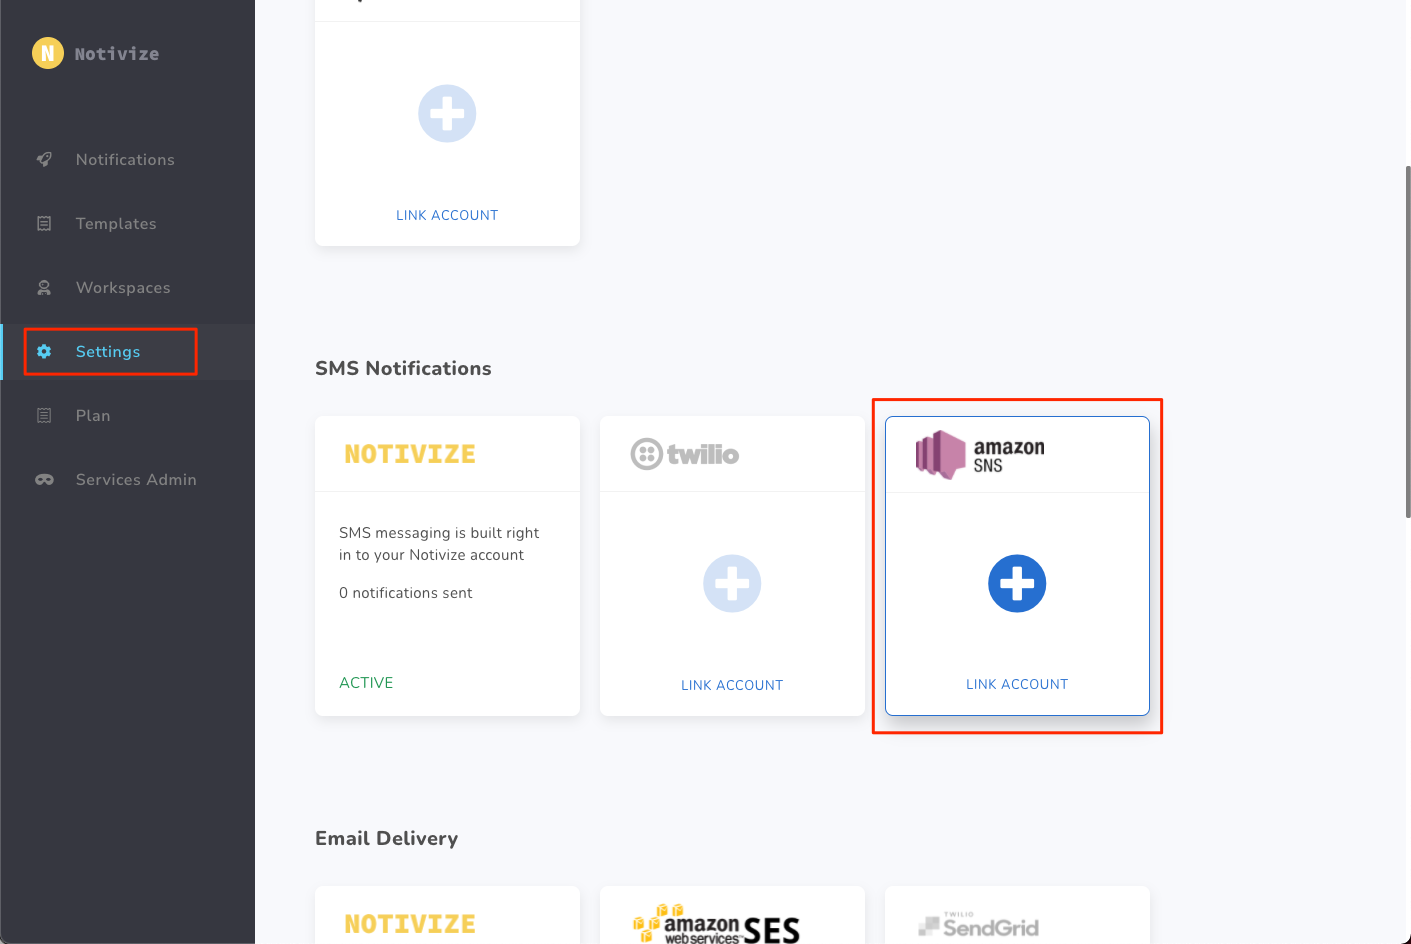
Integrate with Notivize
- Go to https://home.notivize.com
- Sign in into your account
- Go to "Settings"
- Click on "Link Account" from the SNS card

- Give the service a name you can remember easily. Use the IAM user credentials to fill in
AWS ACCESS KEY IDandAWS SECRET ACCESS KEY, and setRegion Nameto the region you want to publish SMSes from. - Click
Link SNS Account
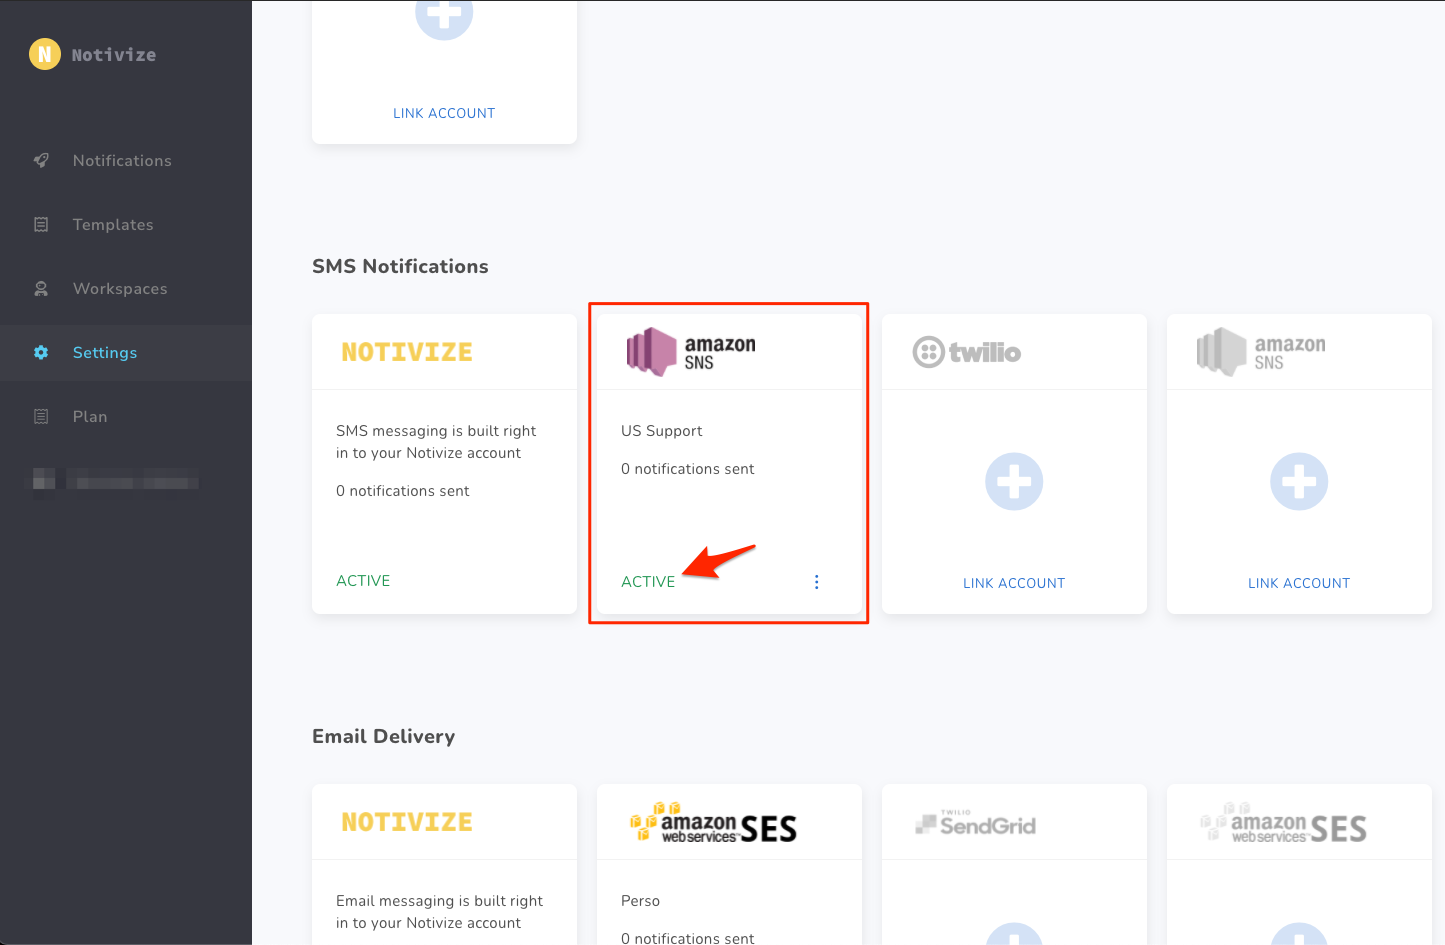
You have now successfully linked your SNS account with Notivize! 🎉 You are good to go and now you can select it as a service when creating/editing notifications. ✨
Don't stop here though, make sure you go through the next section (it's short, we promise!) to be able to track your delivery metrics in Notivize.
❗️ Integration Failure
If you get an error or the status of your integration shows "Inactive", make sure you have given your IAM user the correct permissions and try again.
You can also contact us at help@notivize.com, we'd be happy to help!
Forward delivery metrics to Notivize
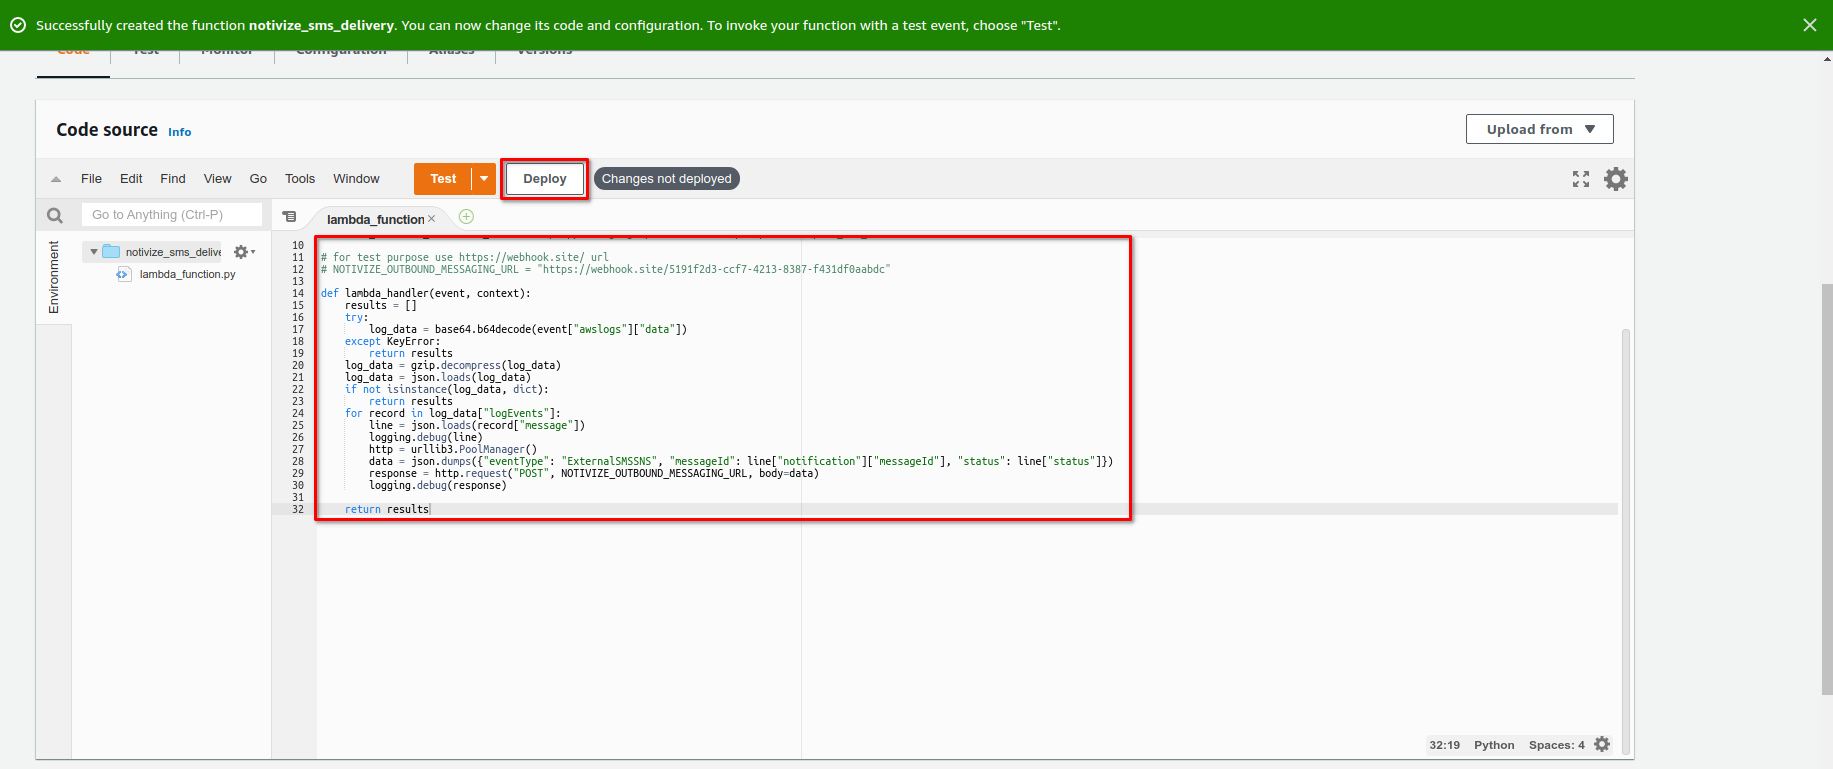
Create a Lambda function
In order for Notivize to be able to track your delivery metrics properly, you will need to create a lambda function that parses the SNS cloudwatch logs and forwards the interesting parts.
- Log in into your AWS account
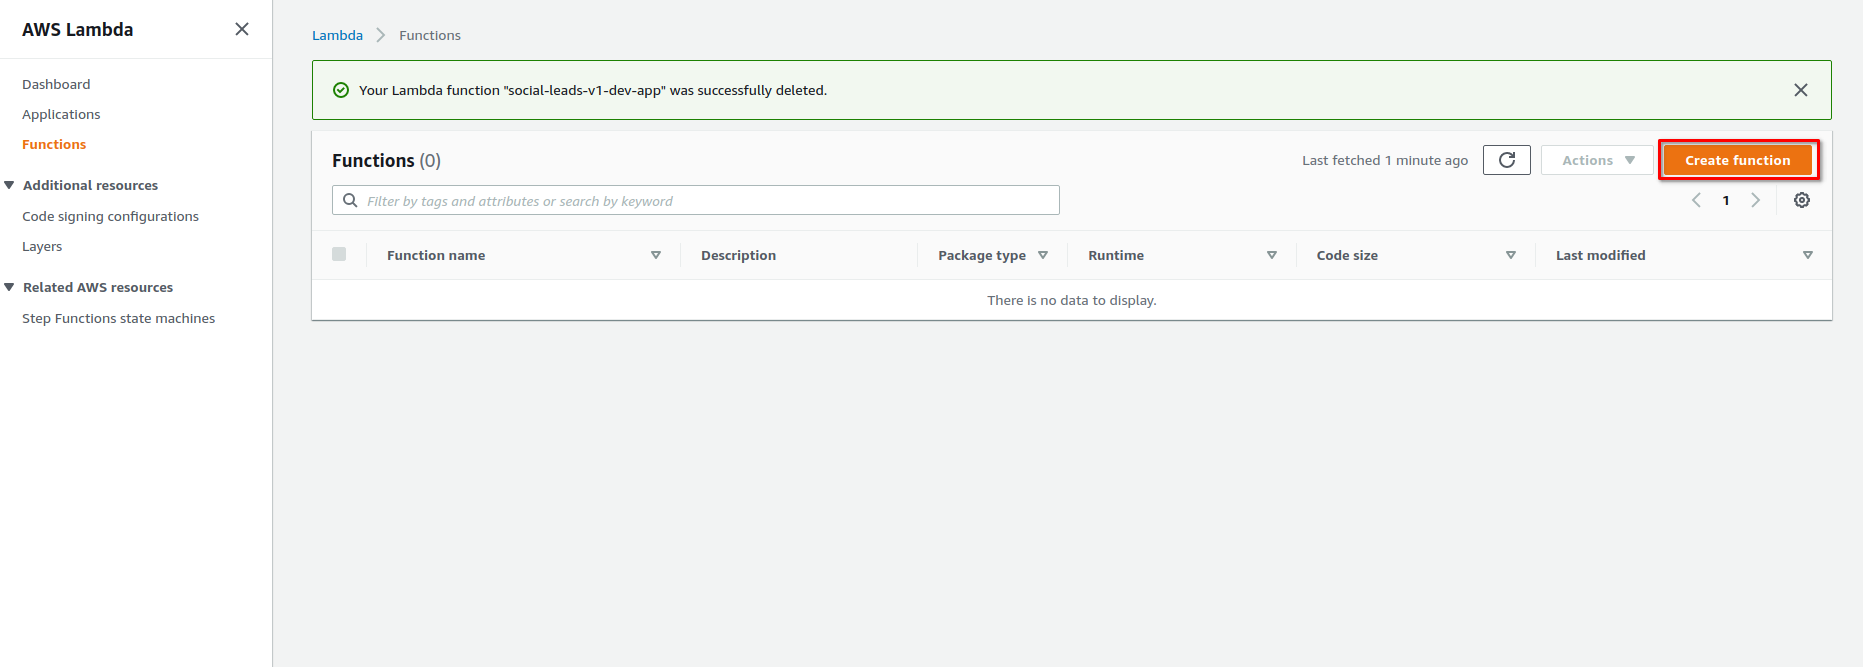
- Go to the Lambda console: https://console.aws.amazon.com/lambda/home#/functions
- Click "Create function"
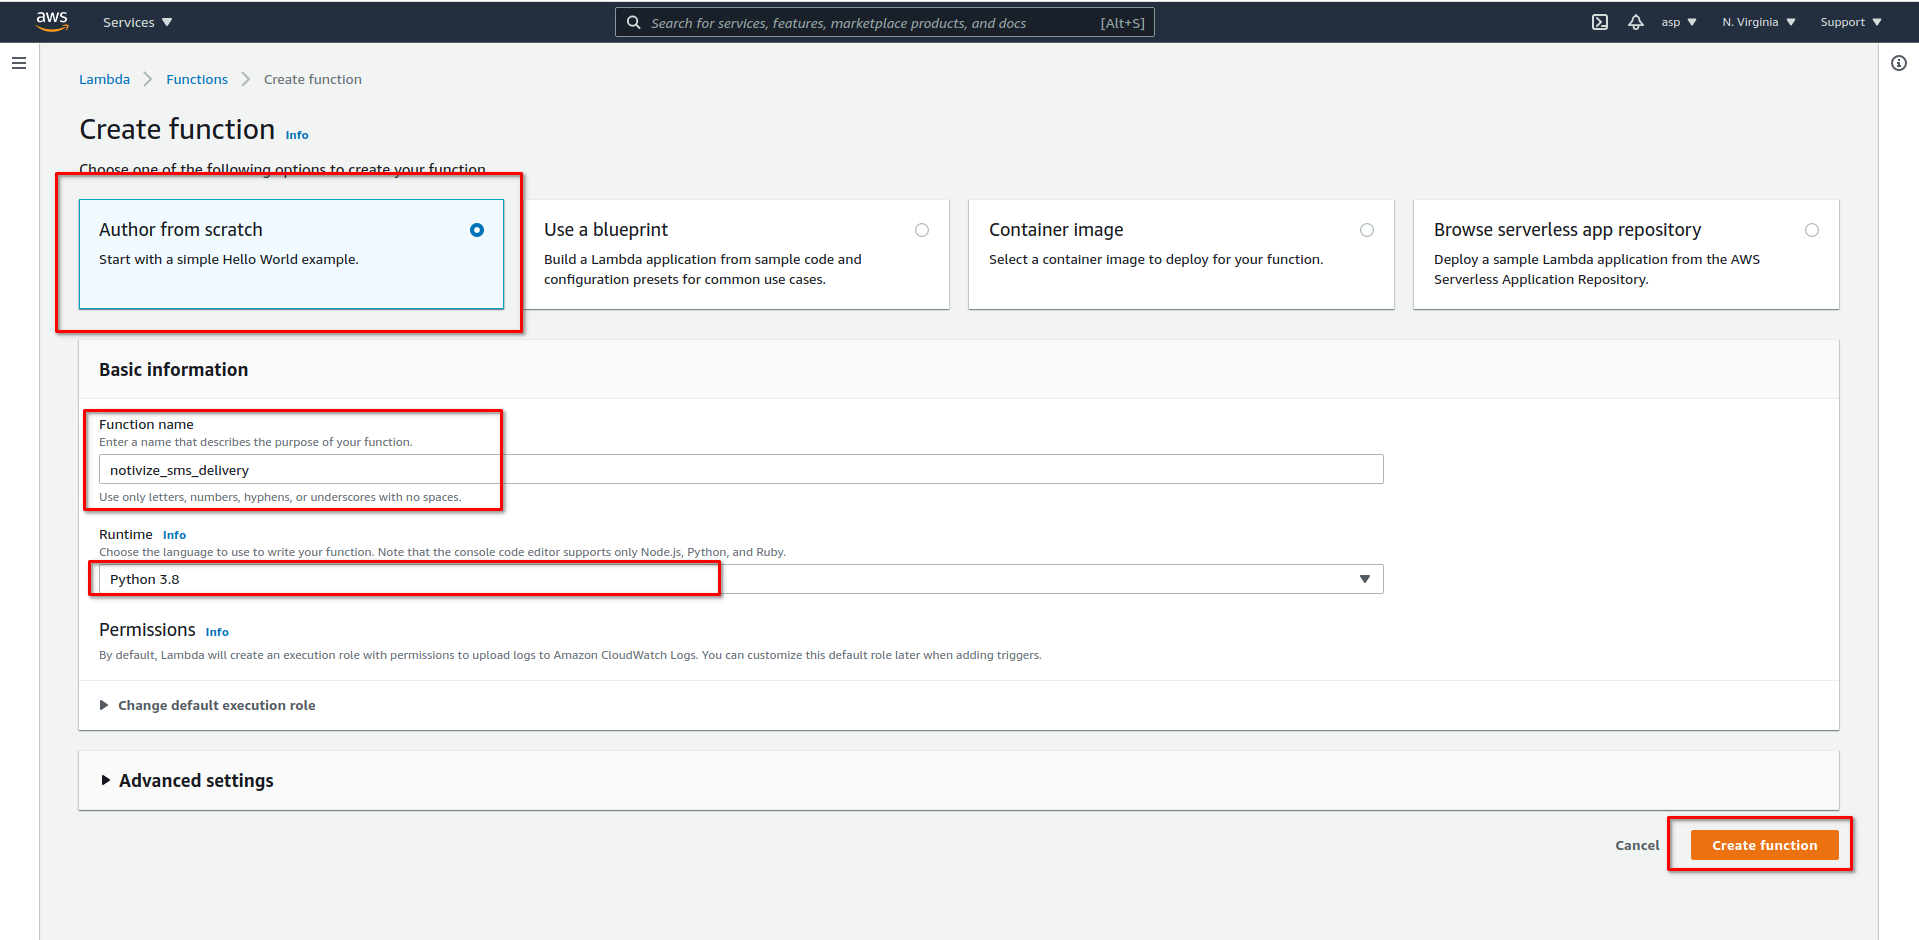
- Select "Author from scratch", give it a useful name (e.g.
forward-sns-metrics-to-notivize) - Choose "Python 3.8" as Runtime
- Click "Create Function"
- In the file
lambda_function.py, copy/paste the following code:
import base64
import gzip
import json
import logging

import urllib3


NOTIVIZE_URL = "https://messaging-api.notivize.com/aws/sns/outcomes"


def lambda_handler(event, context):
    results = []

    # Extracting data from logs
    log_data = base64.b64decode(event["awslogs"]["data"])
    log_data = gzip.decompress(log_data)
    log_data = json.loads(log_data)

    http = urllib3.PoolManager()

    for record in log_data["logEvents"]:
        message = json.loads(record["message"])
        logging.debug(message)
        body = json.dumps({
          "eventType": "ExternalSMSSNS",
          "messageId": message["notification"]["messageId"],
          "status": line["status"],
        })
        response = http.request("POST", NOTIVIZE_URL, body=body)
        logging.debug(f"{response.status} {response.data}")
- Save the file and click "Deploy"
Connect the Cloudwatch logs to the Lambda function
- Go to the Cloudwatch console and click on "Log groups"
- Search for the log group ending with "DirectPublishToPhoneNumber" and click on it
- Click on the "Subscription Filters" tab
- Click on Create and select "Create Lambda Subscription filter"
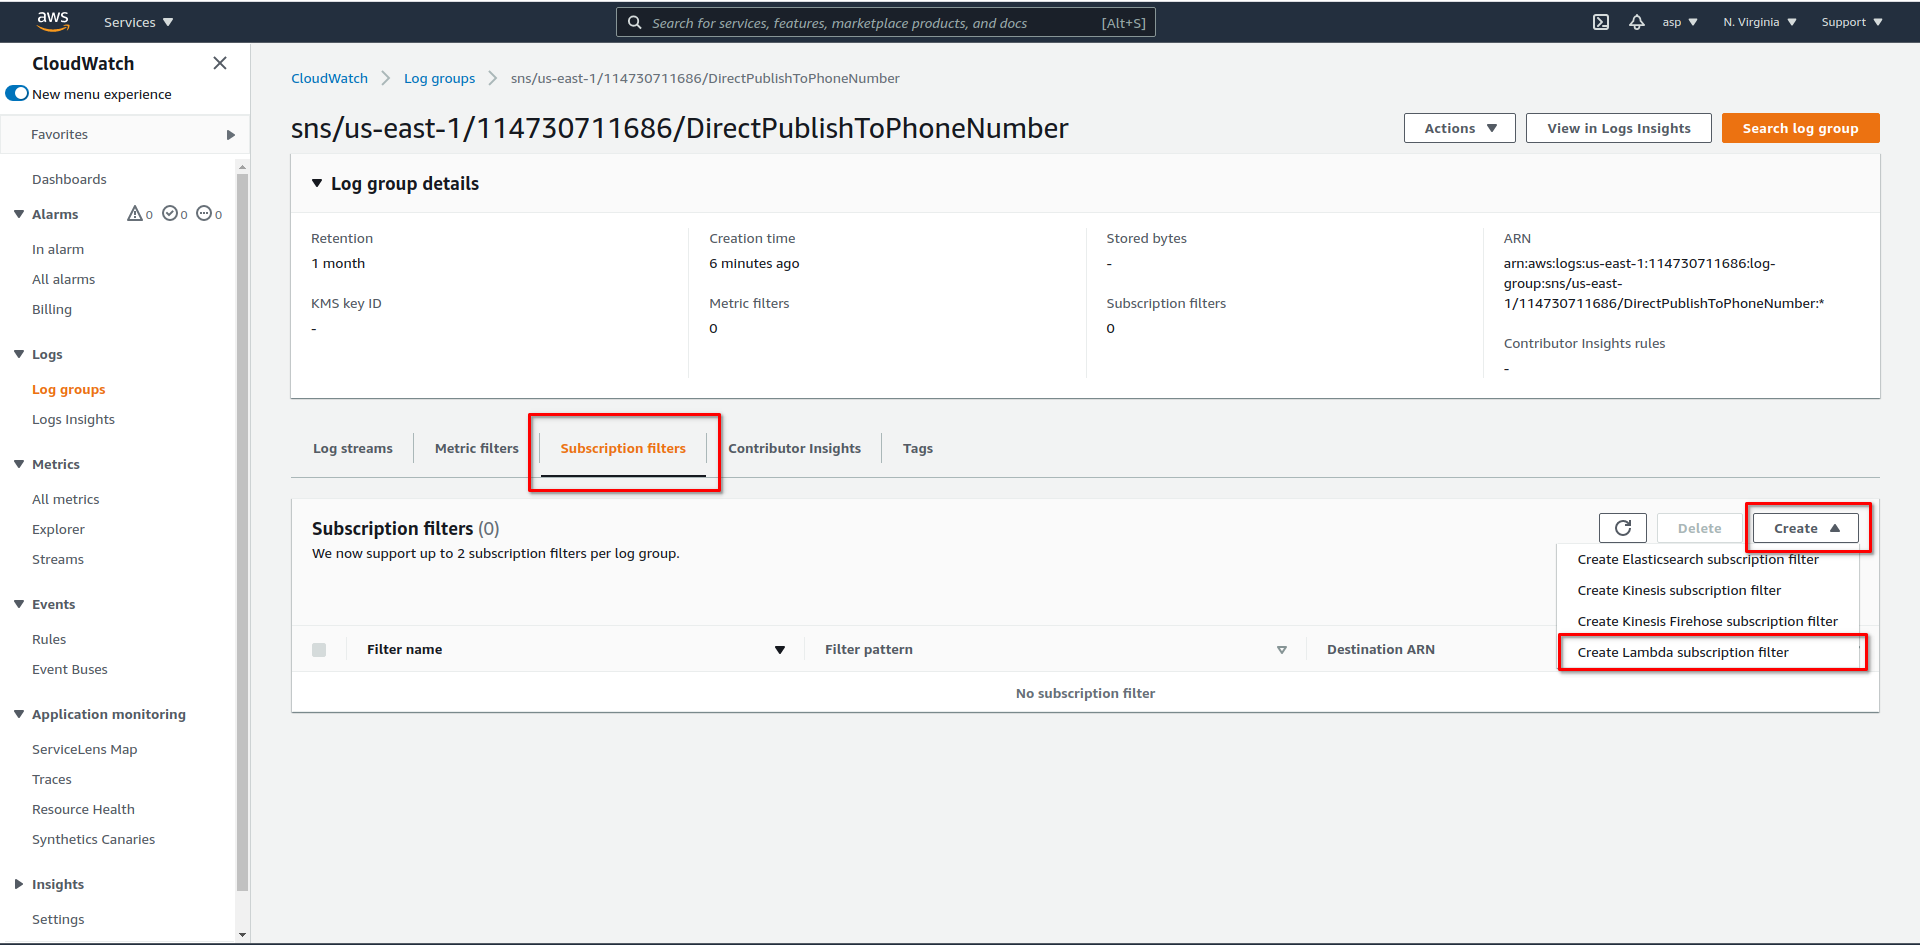
- Select the lambda function we previously created as the destination
- Give a name to your subscription (e.g. forward-logs-to-notivize)
- Click on "Start Streaming"

❗️ Additional Costs
Note: you'll be charged for the lambda usage. Unfortunately, this is the only way currently to be able to forward delivery information from SNS.